To install the UNH-IOL certificate, follow the 5 steps below. Once installed, this procedure does not need to be repeated until another certificate is issued at the start of the next calendar year.
Adobe Reader X or later must be installed.
Step 1
Save the current certificate for 2026 to your computer, then double-click the file to open it. (Previous public certificates are located on the All Certificates and Fingerprints page.)
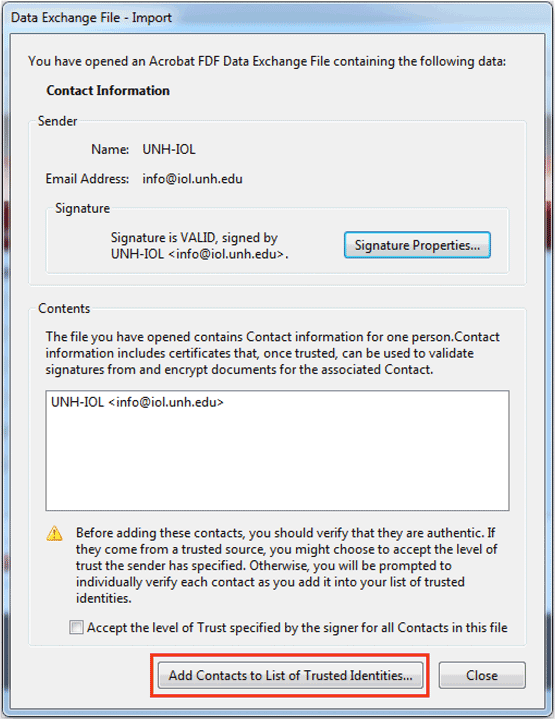
This file should automatically open Adobe's Data Exchange File Import window.
Click Add Contacts to List of Trusted Identities to open the Import Contact Settings dialog box.
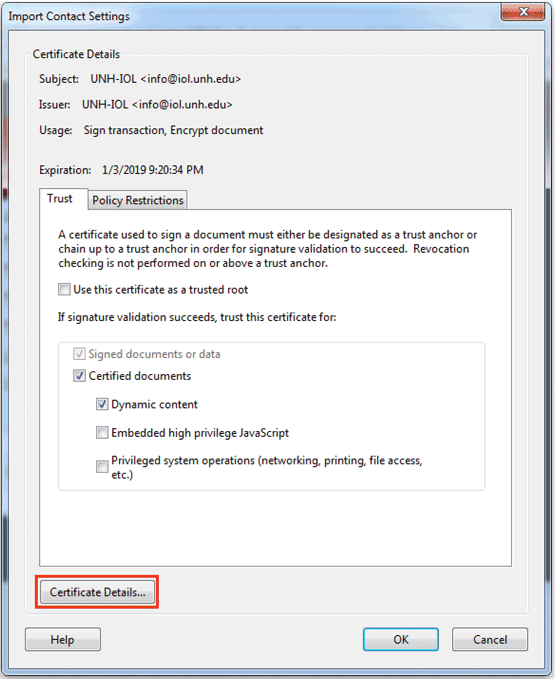
Step 2
From the Import Contact Settings dialog box, click Certificate Details. This will open the Certificate Viewer dialog to enable you to verify the certificate's validity.
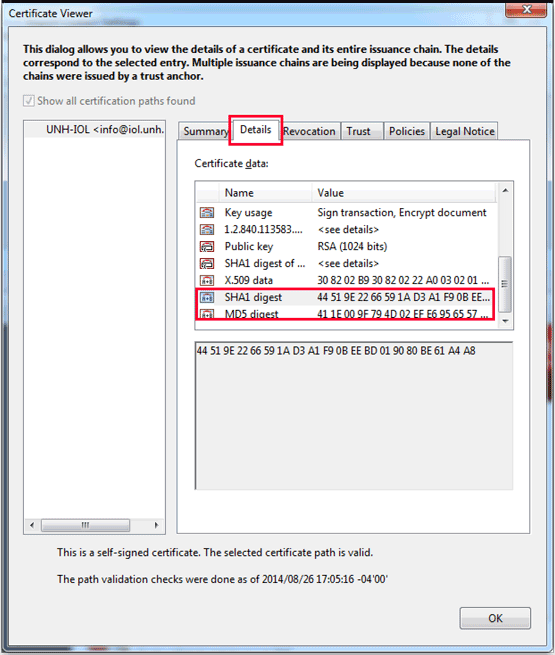
Step 3
Click on the Details tab in the Certificate Viewer, and then scroll down through the Certificate data until you see the SHA1 Digest and MD5 Digest fields.
Verify that the MD5 and SHA-1 Fingerprints in the certificate are correct by comparing them with our list of fingerprints. Please note, for additional security, we generate a new certificate each calendar year, and the fingerprints are different for each certificate/year.
If the fingerprints do not match then the certificate is a forgery.
Step 4
After validating the certificate, click the OK button to close the Certificate Viewer.
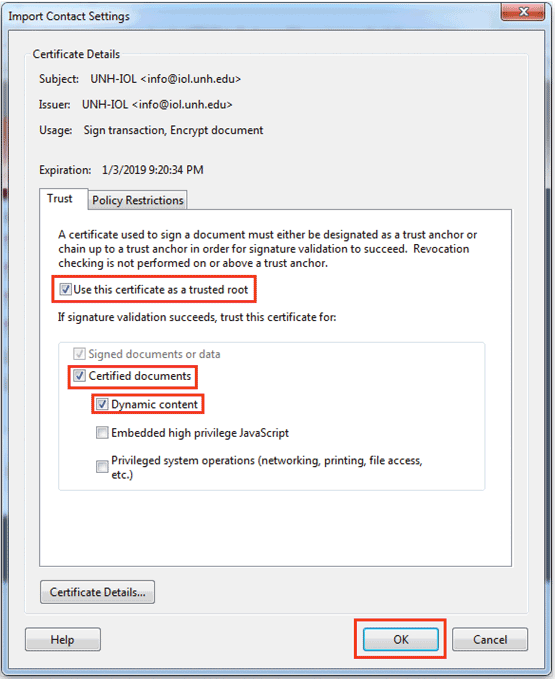
Ensure the checkboxes Use this certificate as a trusted root, Certified Documents, and Dynamic Content are selected, and then click OK to import the certificate into Adobe Reader.
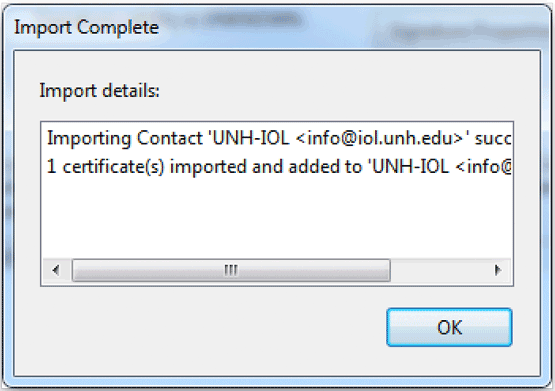
Step 5
Click OK in the Import Complete dialog window. You have successfully installed the UNH-IOL certificate.
For confirmation, you can open this sample signed document for 2026.